Sunday, October 31, 2010

Paper Cuts

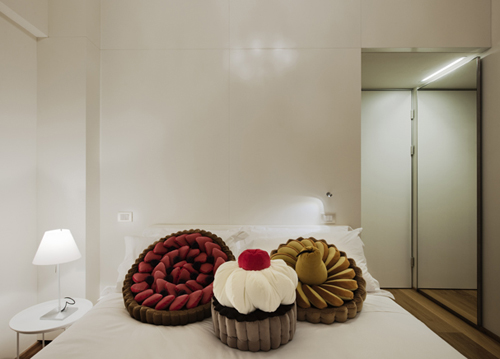
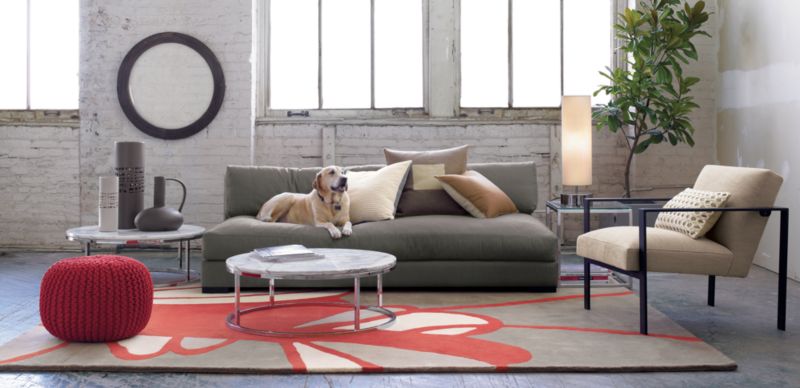
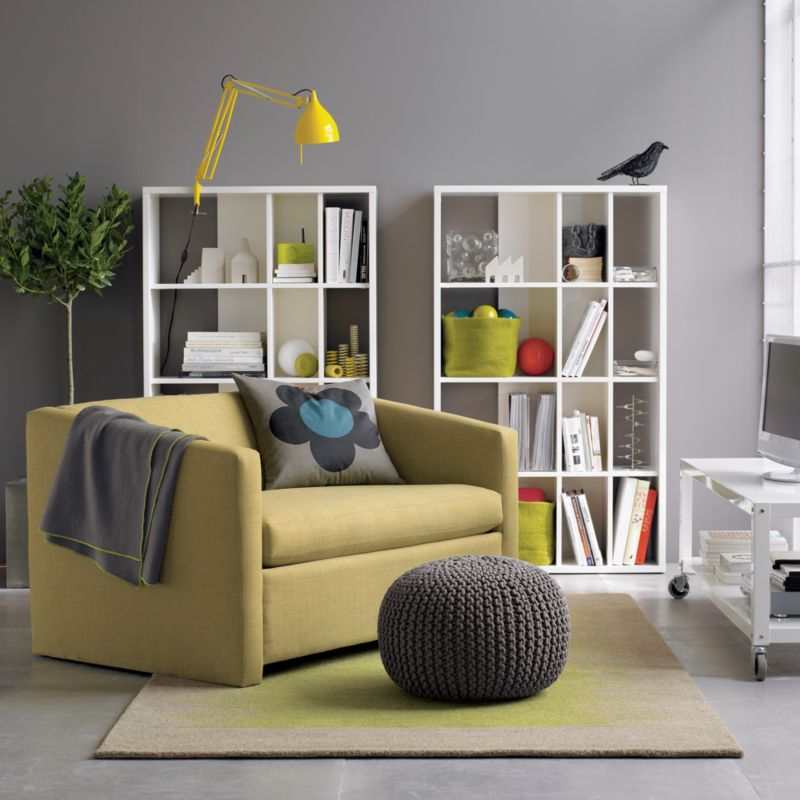
In my fantasy house, I'd turn this


and this


and presto! chango! into this:

Laser Cuts
Laser Cuts by Jellyby on Polyvore.com

Read more...

The Great Pumpkin

Read more...

Friday, October 29, 2010

Ball Chasing is Hard Work

That's what she said.

Read more...

Weekly Roundup: Images That Made Me Happy

Happy Friday everyone!  Have an inspiring Halloween weekend!


Rune Guneriussen via The Jealous Curator
May it be full of books . . .

Hotel Maison Moschino via The Style Files
sweets . . .

Cath of California via Simplesong
and creativity.

Read more...

Thursday, October 28, 2010

When life hands you lemons, make lemon rolls.

My husband and I once found ourselves stranded at the Minneapolis airport.  We had two choices for entertainment: play footsies with a senator in the men's room or cruise the food court.  We chose the latter.  

This happened to be a good choice, not only because glory holes in airport men's restrooms seem rather unhygienic, but also because the airport food court turned out to be the regional training center for Cinnabun.  We pressed our faces against the glass, watching Cinnabun trainees schmear gallons of cinnamon sugar and ginormous blocks of butter on dough.  Many people would have gone into sugar-shock just looking at the process, but I couldn't wait to get my hands on a fresh butter block Cinnabun.

I was reminded of this experience recently when considering this amazing sticky lemon roll recipe.  Would it involve industrial-sized blocks of butter?  Would it be delectable?  Would it make Larry Craig horny?

Sticky Lemon Rolls

Surprisingly, the recipe was more restrained than I expected.  Yes, there's cream cheese and butter and sugar, but not so much that I felt guilty serving . . . or eating it.  Plus I made the rolls with wheat flour (I ran out of AP flour), so in my mind, that makes the rolls healthy.

In any event, they are delicious.  Not too much work.  So bright with the scent and tanginess of the lemons.  And the glaze . . . ah the cream cheese glaze . . . is amazing.

Makes 12 large breakfast rolls

Lemon Roll Dough
  • 1 envelope (0.25 ounces, or 2 1/2 teaspoons) yeast

  • 3/4 cup milk, warmed to about 100°F or warm but not hot on your wrist
  • 1/2 cup (1 stick) unsalted butter, very soft
  • 1/4 cup white sugar
  • 2 teaspoons vanilla extract
  • 4 1/2 cups flour
  • 1/2 teaspoon salt
  • 1/2 teaspoon nutmeg
  • 2 lemons, zested
  • 2 eggs
  • Sticky Lemon Filling
  • 1 cup sugar
  • 1/4 teaspoon freshly-ground nutmeg
  • 1/2 teaspoon powdered ginger
  • 2 lemons, zested and juiced *
  • 3 tablespoons unsalted butter, very soft

Lemon Cream Cheese Glaze
  • 4 ounces cream cheese, softened
  • Juice of 1 lemon
  • 1 cup powdered sugar
  • 1 lemon, zested

In the bowl of a stand mixer sprinkle the yeast over the warmed milk and let it sit for a couple minutes. With the mixer paddle, stir in the softened butter, sugar, vanilla, and one cup of the flour. Stir in the salt, nutmeg, and lemon zest. Stir in the eggs and enough of the remaining flour to make a soft yet sticky dough.

Switch to the dough hook and knead for about 5 minutes, or until the dough is elastic and pliable.
(If you do not have a stand mixer, stir together the ingredients by hand, then turn the soft dough out onto a lightly floured countertop. Knead the dough by hand (see this video for explicit instructions) for 5 to 7 minutes, or until the dough is smooth, pliable, and stretchy.)

Spray the top of the dough with vegetable oil, and turn the dough over so it is coated in oil. Cover the bowl with plastic wrap and a towel and let the dough rise until nearly doubled - about an hour.
In a small bowl, mix the sugar with the nutmeg and ginger, then work in the lemon zest with the tips of your fingers until the sugar resembles wet, soft sand. Stir in the juice of 1 lemon. (Reserve the juice of the second lemon for the glaze.)

Lightly grease a 13x9 inch baking dish with baking spray or butter. On a floured surface pat the dough out into a large yet still thick rectangle — about 10x15 inches. Spread evenly with the softened butter, then pour and spread the lemon-sugar mixture over top. Roll the dough up tightly, starting from the top long end. Cut the long dough roll into 12 even rolls, and place them, cut side up, in the prepared baking dish.

Cover the rolls with a towel and let them rise for an hour or until puffy and nearly doubled. (You can also refrigerate the rolls at this point. Cover the pan tightly with plastic wrap, and place it in the refrigerator for up to 24 hours. When you are ready to bake the rolls, remove the pan from the fridge, and let them rise for an hour.)

Heat the oven to 350°F. Place the risen rolls in the oven and bake for 35 minutes or until a thermometer inserted into a center roll reads 190°F.

While the rolls are baking, prepare the glaze. In a small food processor (or with a mixer, or a sturdy whisk), whip the cream cheese until light and fluffy. Add the lemon juice and blend until well combined. Add the powdered sugar and blend until smooth and creamy.

When the rolls are done, smear them with the cream cheese glaze, and sprinkle the zest of 1 additional lemon over top to garnish. Serve while warm.

Read more...

Wednesday, October 27, 2010

I'm Flor'd

I have been staring at fifteen almost identical, mainly cream-colored carpet tiles for three days.


AAAAAAAARRRRRGH.

I have a (in)decisiveness problem.  

If admitting you have a problem is the first step, what do I do next?  Throw a dart?

Read more...

You're porcelain in a paper cup world

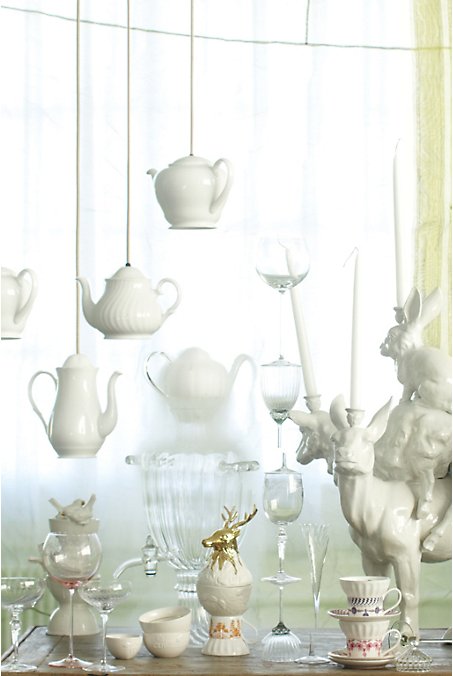
Where is this whimsical party, where the teapots are lights?  And why have I not been invited?

Anthropologie

I'm so charmed by these teapot pendants at Anthro.  
It's too bad they totally don't go with our decor. And that my husband would have me committed if I were to install them in our house.
But if I were designing a little girl's room, I'd totally use them as the focal point of an Alice-in-Wonderland themed room.

Teapot Pendant, Wavy

Sigh.  Another addition to the fantasy house in my mind.

Read more...

Chic DSLR Camera Bags, Pt. 2

If you recall my search for a fabulous DSLR bag, my fantasy bag was the gorgeous Ona Nevis bag.  Alas, it's so spendy that I'd have to sell the DSLR to get the bag.  So back to square one.

Ona Nevis Bag

I briefly considered the Epiphanie Lola bag, which at $164.99 is considerably more reasonable than the Nevis.  If it's good enough for the Pioneer Woman and Dooce, it's good enough for me.

Image Source

I was concerned though that it might be a bit chunky.  I want a bag that I can alternate between wearing on the shoulder and slung across like a messenger bag, and the Lola looks like it would stick out quite a bit when worn the second way (esp. considering the junk in my trunk . . . and hips).  Also, since I'm a total beginner and don't need to carry around multiple lenses, I can easily get away with a bag with a slimmer profile.

Does such a bag exist?  

Why yes.  Behold the Kelly Moore B-Hobo bag:


It's chic, slim, and as cute worn on the shoulder as it is as a messenger bag.  It's $159.  Plus it comes in green, walnut, blackgrey, mustard, and teal.

Kelly Moore B-Hobo

All the bags, regardless of outside color, have a gorgeous lavender lining.

Now I just need to decide on a color.

I'm leaning toward the grey (versatile) and mustard (fun).  Both are backordered for now, but the grey is coming in November, and the mustard in early December.

What do you think?

P.S. If you're also intrigued by the Epiphanie Lola and the Kelly Moore B-Hobo, the most helpful reviews of both I found (with gorgeous and very helpful photos) were written by photographer Michelle Moore.  See her Lola review here.  And her B-Hobo review here.

Read more...

Tuesday, October 26, 2010

Cloche to my heart

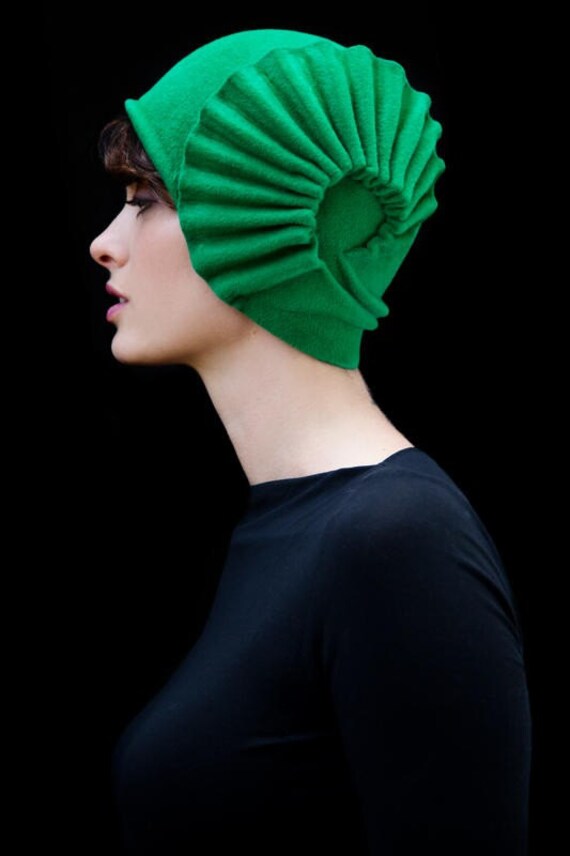
It was a balmy 70 degrees in Boston today.  But I know that's not going to last long.  And so far, the only thing that makes the impending winter even somewhat bearable is the amazing hat collection by yellowfield7.

Antique Royal Cloche
Pink Red Cloche
Pink Autumn
Film Noir
Dream Hat

I would like them all.  Each one is only like $400.

Oh well.  A girl can dream, right?

Read more...

I don't know whether to laugh or cry

As some of you know, I recently quit a Ph.D. program after toiling in misery for 6+ years.  I've been meaning to write a series of posts about this, but I don't think I'm quite ready yet.

In the interim, there's this video:

Read more...

Diary of a Secret Housewife: Miso Cod, Nobu-style

I've never been to Nobu.  

But it has often come to me.


In the form of this miso cod recipe, which is nothing sort of awesome.  And what's even more fantastic is that the delicious miso glaze can be used in so many ways beyond the cod recipe: use it as a glaze on grilled eggplant or as a dip for crudites, spread it on toast, or swirl it into risotto.


It's sweet, umami, smoky . . . pure deliciousness.

Ingredients


  • For Nobu-style Saikyo Miso
    • 3/4 cup saké
    • 3/4 cup (150 ml) mirin
    • 2 cups (450 g) white miso paste
    • 1 1/4 cups (225 g) granulated sugar
  • For cod
    • 4 black cod fillets, about 1/2 pound (230 g) each
    • 3 cups (800 g) Nobu-style Saikyo Miso
    • 1 stalk hajikami per serving

Preparation

Make Nobu-style Saikyo Miso:

  1. Bring the saké and the mirin to a boil in a medium saucepan over high heat. Boil for 20 seconds to evaporate the alcohol.
  2. Turn the heat down to low and add the miso paste, mixing with a wooden spoon. When the miso has dissolved completely, turn the heat up to high again and add the sugar, stirring constantly with the wooden spoon to ensure that the bottom of the pan doesn’t burn. Remove from heat once the sugar is fully dissolved. Cool to room temperature.

Yield:
3 cups (800 g)

Make cod:

  1. Pat fillets thoroughly dry with paper towels. Slather the fish with Nobu-style Saikyo Miso and place in a non-reactive dish or bowl and cover tightly with plastic wrap. Leave to steep in refrigerator for 2 to 3 days.
  2. Preheat oven to 400°F (200°C, gas 6). Preheat a grill or broiler. Lightly wipe off any excess miso clinging to the fillets but don't rinse it off. Place the fish on the grill, or in a broiler pan, and grill or broil until the surface of the fish turns brown. Then bake for 10 to 15 minutes.
  3. Arrange the black cod fillets on individual plates and garnish with hajikami. Add a few extra drops of Nobu-style Saikyo Miso to each plate.

Read more...

Sunday, October 24, 2010

A chocolate-licious birthday for my husband!

A certain somebody turned 35 today.  And that's worth making the most decadent cake ever -- chocolatey, not too sweet, with a subtle trace of coffee flavor.


The recipe is Ina Garten's.  It can't be an easier recipe to follow (just don't forget to add baking soda, as I did the first time).  And your spouse will swoon with happiness, and your guests will lick their forks and the cake plate when they think you're not looking.

Double Chocolate Layer Cake


  • 1 3/4 cups all-purpose flour, plus more for dusting
  • 2 cups sugar
  • 3/4 cup unsweetened cocoa powder
  • 2 teaspoons baking soda
  • 1 teaspoon baking powder
  • 1 teaspoon kosher salt
  • 1 cup buttermilk
  • 1/2 cup vegetable oil
  • 2 large eggs
  • 1 teaspoon pure vanilla extract
  • 1 cup freshly brewed hot coffee
  • Frosting
  • 6 ounces semisweet chocolate, coarsely chopped
  • 2 sticks (1/2 pound) unsalted butter, at room temperature
  • 1 large egg yolk
  • 1 teaspoon pure vanilla extract
  • 1 cup plus 1 tablespoon confectioners' sugar, sifted
  • 1 tablespoon instant coffee granules


Preheat the oven to 350°. Butter two 8-inch round cake pans and line them with parchment paper; butter the paper. Dust the pans with flour, tapping out any excess.

In the bowl of an electric mixer fitted with a paddle, mix the flour with the sugar, cocoa powder, baking soda, baking powder and salt at low speed. In a medium bowl, whisk the buttermilk with the oil, eggs and vanilla. Slowly beat the buttermilk mixture into the dry ingredients until just incorporated, then slowly beat in the hot coffee until fully incorporated.

Pour the batter into the prepared pans. Bake for 35 minutes, or until a toothpick inserted in the center of each cake comes out clean. Let the cakes cool in the pans for 30 minutes, then invert the cakes onto a rack to cool completely. Peel off the parchment paper.

In a microwave-safe bowl, heat the chocolate at high power in 30-second intervals, stirring, until most of the chocolate is melted. Stir until completely melted, then set aside to cool to room temperature.

In the bowl of an electric mixer fitted with a paddle, beat the butter at medium speed until pale and fluffy. Add the egg yolk and vanilla and beat for 1 minute, scraping down the side of the bowl. At low speed, slowly beat in the confectioners' sugar, about 1 minute. In a small bowl, dissolve the instant coffee in 2 teaspoons of hot water. Slowly beat the coffee and the cooled chocolate into the butter mixture until just combined.

Set a cake layer on a plate with the flat side facing up. Evenly spread one-third of the frosting over the cake to the edge. Top with the second cake layer, rounded side up. Spread the remaining frosting over the top and side of the cake. Refrigerate for at least 1 hour before slicing.

MAKE AHEAD
The frosted cake can be refrigerated for 2 days. Let stand for 1 hour before serving.

Read more...

Friday, October 22, 2010

Chic DSLR Camera Bags

Say you're a fashionable, on-the-go blogger would sooner go without cupcakes than be without her DSLR.  Do you carry your camera around in an ugly nylon man bag?

Of course not.

Or so I'd imagine.


If someone (hint, hint) were to gift me with said DSLR for Hanukkah, then I'd surely need a gorgeous bag to tote the camera around.

What I adore about the bags above is that they bear no resemblance to nylon/neoprene camera bags.  Rather, they're all chic purses in their own right; they just happen to have neoprene or padded compartments to hold your camera gear.

Stash Messenger Bag


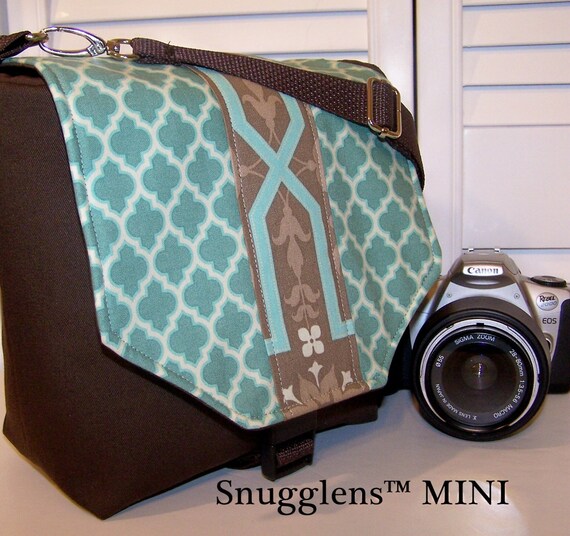
Snugglens Mini Messenger Bag

The above messenger bag options from Etsy are less purse-like, but still chic enough to pair with a cute outfit and stylish enough to not scream to all the thieves of the world "camera! steal me!"

Ona Nevis Bag

My dream bag, however, is still this fabulous Nevis bag by Ona.  The cognac color, the tapestry lining, the brass-colored feet, and the amazing padded compartments that safely ensconce your camera body, two lens, and personal items, like an iPhone . . . I simple love it.

Ona Nevis Bag

Fancy camera people, what do you carry your DSLR in?  When it comes to camera bags, are you all about fashion, comfort, or utility?

Read more...

Wednesday, October 20, 2010

Sweater Weather

Maybe it's because of the chill that's now very much present in the air, or maybe it's because I've been watching too many episodes of "Hoarders" and sort of feel like an old cat lady, I saw these crocheted poufs on Desire to Inspire today and really wanted to snuzzle up on one.

Lindsay Bentis via Desire to Inspire

"Snuzzle," it turns out, is not a word.  But it should be.

Lindsay Bentis via Desire to Inspire
Because how else would you describe these giant, sweater-like ottomans other than as "snuzzly"?

Urchin Pouf
Grouped together, the snuzzly poufs are extra-snuzzly.  And tres adorable, like cozy sweater candy buttons.  (It's best not to over-think the similes; just go with it.)

CB2
I found knitted poufs at CB2 for a reasonable $79.95.  They come in gray or blood-orange, and while they're not quite as large and statement-making as the ones in the inspiration photos above, they still seem pretty snuzzly.

CB2
I'm thinking they'd be great as ottomans in our living room.  Now, to decide whether to get one or two . . . and gray or blood-orange?

Update: These poufs from Ferm Living might be even better!  How about a large gray pouf with a medium mustard-colored pouf?

Ferm Living Poufs

Read more...

Tuesday, October 19, 2010

Missing Links

Scrolling through Apartment Therapy today, I came across this living room that is like an amped up, technicolor version of ours.  And my eye was immediately drawn to the cool little drum-shaped, chain-linked accent table between the two Eames plywood chairs.

It was quirky, minimalist, industrial chic . . . I loved it.

Apartment Therapy
After much googling, I discovered that the object of my desire was the "Links side table" from CB2.  "CB2," I thought to myself.  "Awesome!  Must be affordable."

And you know what?  It was.  $149!

Emphasis, however, on WAS.  Damn table's sold out.

Arrrrrrgh.

The only tables I found that are remotely close to the CB2 table are this cylindrical version:

Lazy Susan Weathered Oval Ring Table

and this hourglass-shaped version:

Hourglass Side Table
Neither are as affordable as the CB2 table.  Boo.

What to do?

Read more...

Serena & Lily are my new BFFs

Seriously, I pretty much love each and every piece of furniture at Serena & Lily.  Not only are the pieces all gorgeous, most are customizable.

Look at the ornate carved details on these chakkis.  They're probably a bit too ornate for our living room, but I could see them working as functional and chic ottomans.
What might work, however, is this Gemini Bench, which is the perfect combination of mid-century simplicity and chinoiserie.
How fun is this lacquered bamboo Lucky table?  
Speaking of fun, I'd design a whole party room around these cheerful Chai Nesting Tables.

Sigh.  If only I had an unlimited budget and a few extra rooms to work with . . . .

Read more...

Monday, October 18, 2010

Pink Wishbone Project

As someone who loves classic, iconic furniture, I've been pining for a Wegner Wishbone Chair, especially after I discovered that it was designed by Wegner as an homage to the Quan Yi, a Ming dynasty ceremonial chair.  Imagine my delight when I heard that 20 designers were updating the Wishbone Chair to benefit the Breast Cancer Foundation.

Oh, and all the chairs are pink.  Be still my Lisa-Frank-loving, 10-year-old heart.

Here are some of my faves:

Julie Hillman for the Pink Wishbone Project
Mid-century modern meets Zsa Zsa Gabor.

Sara Rothman for the Pink Wishbone Project
Sara Rothman's chair is cray-cray, and I love it.  It was inspired by the Portuguese Man O' War, but it reminds me of a giant Koosh ball.

Kelly Wearstler for the Pink Wishbone Project
Kelly Wearstler's chair has a leather cushion bedazzled (be-pinned?) with a gazillion safety pins.  Very Versace chic.  Looks about as comfortable as a Versace too.

You can see the rest of the designs on auction at the Charity Buzz website.  Which is your favorite?

Read more...
Related Posts with Thumbnails

Doubly Happy on Facebook

  © Blogger templates Psi by Ourblogtemplates.com 2008

Back to TOP