Wednesday, March 30, 2011

I like free stuff.

This is a public service announcement to all who, like me, love free stuff.

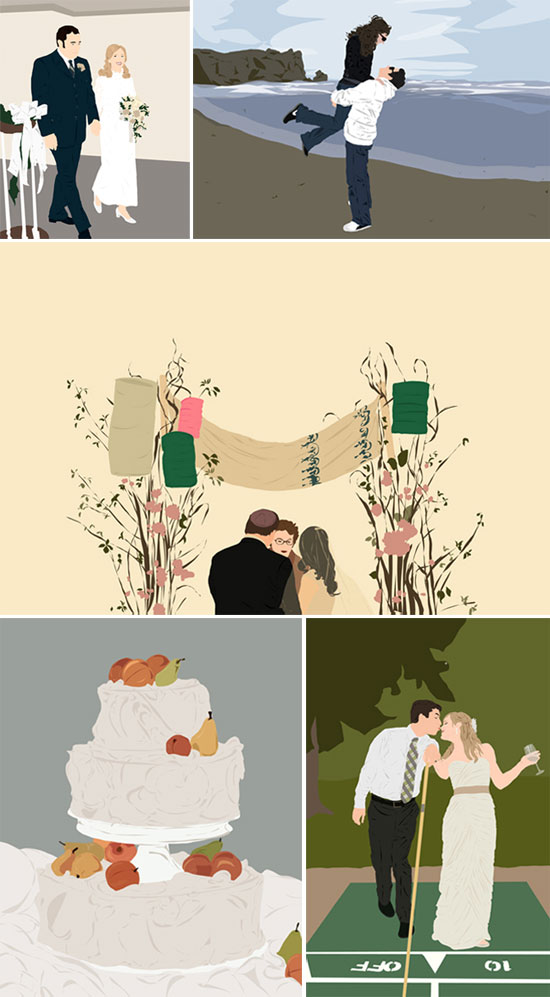
First of all, the awesome Dina Kantor, who created this whimsical illustration for us, is doing a giveaway for one of her custom illustrations here.  I am, of course, totally entering.  Because Jellyby needs to be immortalized in one of Dina's fab drawings.

Image Source

Second, if you're celebrating Passover and need a little help, guidance, or inspiration, JewishBoston.com is offering a DIY seder kit, called "Seder in a Box."  It comes with all you need to run a seder, including a basic haggadah, seder plate, matzo cover, and even a few plastic frogs!  Best of all?  It's free!  Last I checked, they were running low on supplies, so if you want one, you'd better register now.

That's it: two opportunities for free stuff.  Don't say I never do anything for you.  ;-P

Read more...

Monday, March 28, 2011

"It's me! I'm the bobblehead!"

Every once in a while, I get an idea so genius, so monumental, that I can do nothing but be in awe of myself.  I was searching for a gift for my husband for our second anniversary, and kept coming up with only lame ideas.  But one night we were watching reruns of "The Office" -- our favorite show -- and the idea practically smacked me in the face.


A personalized bobblehead!!   There's a hilarious episode of "The Office" in which Angela gives Dwight a bobblehead -- of him! -- for Valentine's Day.  His reaction to the gift is awesome; it's one of those scenes that we watch over and over because it's just that great.


I ordered the bobblehead from Webobble.com, and I couldn't be happier with their service.  I submitted three headshots of my husband, and they sculpted the head in a matter of days.


They allow you to suggest changes at each stage and don't progress to the next phrase until you approve the proof.  The first head they sculpted got the mouth and smile exactly right, but the nose was bent the wrong way and the hair wasn't curly enough.


I made a few suggestions, and the next day they had a new proof for me to review.  Once I okayed it, they proceeded to bake the doll and and paint it.


A few days later, they had the baked and painted proof ready for review.  I thought the eyebrows weren't thick enough, the shirt color was a little off, and the eye color was a bit too green.  A day later, they made the changes I suggested and shipped it off.  It arrived at our house two days later.  All the way from Shenzhen, China.  (Which of course means I could have gotten it for about a quarter of the price had I gotten my act together and ordered it from Shenzhen when I was there over the holidays.)


I paid about $140, which included extra charges for the customized body (you can choose from a zillion standard bodies for no additional charge, but I wanted the bobble to be wearing my husband's usual uniform of yellow tie, blue shirt, and khaki pants) and for rush production and shipping.


My husband loves his bobblehead, but probably not nearly as much as I do.  It's standing on my nightstand, bobbing yes to any and all questions I ask of it.  It's so much more compliant than my actual husband!  Just right now, I asked my bobble husband whether I'm awesome, and it just nodded yes, very vigorously. Bobble husband is so wise!

Are you a fan of "The Office"?

Read more...

Two for two

Happy second anniversary to my husband!


Yeah, he's one lucky dude.


And I'm not so bad off myself!

Here's to two years down, a lifetime more to go.

Read more...

Sunday, March 27, 2011

So You Wish You Could Dance Sundays

This is quite possibly the best dance video ever. Seriously, if you love dance, like dance, merely tolerate dance, you have to watch this.


Read more...

Monday, March 21, 2011

Diary of a Secret Housewife: Hamantaschen

This weekend was the Jewish holiday of Purim, which is awesome for kids (carnival! masks! costumes!) and usually not so much fun for adults.  But I made my own fun by baking my own hamantaschen.   


Hamataschen are triangular cookies, usually filled with poppy seed or fruit jam, that are traditionally served on Purim.  There are various explanations for why they are served on Purim, but usually the story is that they resemble the ears or the hat of Haman, the villain of the Book of Esther, which is the story that gets read aloud at Purim.  Store-bought hamantaschen are usually not so delicious, as most Jewish bakeries are parve, meaning they don't use dairy products, including butter.  I was thus especially psyched to find Smitten Kitchen's recipe, which has butter AND cream cheese!   Whee!


Here's the recipe, with my revisions, adapted from Smitten Kitchen.

Ingredients:
  • 8 tablespoons unsalted butter, softened
  • 3 ounces cream cheese at room temperature
  • 4 tablespoons sugar
  • 1 egg
  • 1 teaspoon vanilla extract
  • Zest of one orange
  • 1/4 teaspoon nutmeg
  • 1 1/3 cups plus 4 teaspoons flour
  • 1/4 teaspoon salt
  • Various jams (I used boysenberry and raspberry) or prepared fillings (such as poppy seed or prune pastry filing)

Directions: 

Cream butter and cream cheese together until smooth. Add sugar and mix for one minute longer, then egg, vanilla extract, orange zest and salt, mixing until combined. Finally, add the flour. The mixture should come together and be a tad sticky. 

Form dough into a disc, wrap in plastic and refrigerate for at least an hour.

Preheat oven to 350°F.


To form the hamantaschen, roll out the dough on a well-floured surface until it is about 1/4-inch thick (I like my cookies more delicate, so I went for a little less than 1/4 inch). Using a round cookie cutter (or just the top of a small bowl) and cut the dough into circles. Spoon a teaspoon of you filling of choice in the center.


Fold the dough in from three sides and firmly crimp the corners and give them a little twist to ensure they stay closed.  Some of my first batch of cookies flattened out completely in the oven, so trust me when I tell you to really crimp the corners tight (you can even brush a little bit of egg on the corners to seal them).  It also helps to refrigerate the folded cookies for a little while before baking, so that they hold their shape a bit more.


Next time I make this though, I'm not going to try to keep the three "walls" standing straight up.  I'm just going fold the three sides in a bit more, almost like a paper football, so that they almost completely cover the jam.  That way, they will hold the triangular shape.


But let me assure you that even if they come out all deformed or flat like mine did, they still taste pretty darn good.  The dough is light, buttery, and flavorful, not dry and hard like parve hamantaschen usually are.

Have you ever made hamantaschen?  Do you have any advice for how to get them to hold their shape?

Read more...

Sunday, March 20, 2011

So You Wish You Could Dance Sundays

This piece by Kate Jablonski is seriously, seriously genius.


Synchronized "swimming" just got a lot more awesome.

Read more...

Wednesday, March 16, 2011

Tikkun olam

Today I learned that Bill Stuntz, one of my favorite law school professors, passed away after a struggle with liver cancer.  Professor Stuntz was a brilliant scholar, a generous mentor, an inspiring teacher, and, most of all, a deeply kind man.  Yes, he taught generations of Harvard Law students criminal law.  But he also taught us to practice with compassion, humility, and heart.

In a moving interview he gave after his cancer metastasized, he said:

We understand that the world is not what it should be, and that our own capacities to understand it are severely limited.
Professor Stuntz was an evangelical Protestant, but this sentiment -- and the curiosity, passion, and work it motivated -- is about the most succinct expression of tikkun olam, the Jewish concept of "repairing the world," that I have ever read.

Even in his absence, his words live as a reminder to us to listen, learn, reflect, and transform.

Read more...

Dog-Cat Nap

Being adorable is hard work.


Read more...

Monday, March 14, 2011

Whoopie!

You know I love whoopie pies.  And funny enough, my new temporary job is in Maine, which is about to name the whoopie pie its official state dessert -- even if the state has to get into a food war with Pennsylvania, which also wants to claim the goodness for itself.


They can fight over the bragging rights.  I, however, would rather be eating these awesome red velvet whoopie pies, which were made by my friend Amy from Bakerella's recipe.


And I'll let you in on a secret: these whoopies are allegedly super easy to make because you can use red velvet cake mix.  Shh!


Here's the recipe, courtesy of Amy and Bakerella:

Ingredients:


  • 1 Box red velvet cake mix
  • 1/2 Cup butter, softened to room temperature
  • 2 Eggs
  • 1/2 Cup butter, softened to room temperature
  • 1 8 oz. Package cream cheese, softened to room temperature
  • 1 1lb. Box of confectioner’s sugar
  • 1 tsp Vanilla
Preheat oven to 350 degrees.

First make the cookies by mixing the first four ingredients until combined.  Drop spoonfuls of cookie batter onto baking sheet about two inches apart.  Bake for 10-12 minutes. Cool.

Then make the cream cheese frosting by creaming the butter, cream cheese, and vanilla in a mixer.  Gradually add sugar and mix until smooth.

Makes about 24 cookies or 12 cookie sandwiches


Read more...

Sunday, March 13, 2011

Diary of a Secret Housewife: Roasted Mushrooms, Escargot-Style

My sister loves escargot.  Me?  I'm not so into snails.  But I do love the luscious butter and garlic they get cooked in.  So when I ran into this recipe in Gourmet for Escargot-Style Roasted Mushrooms, I knew it'd be magical.

It's also super fast and easy.  In about half an hour, your house will smell like a high-class French restaurant.  All you need is a crusty baguette, a bottle of wine, and a fake accent, and you'll be transported.


Ingredients:
  • 1 lb mushrooms such as cremini or white, halved lengthwise if large
  • 2 tablespoons capers, rinsed and chopped
  • 3 large garlic cloves, minced
  • 2 tablespoons vegetable oil
  • 3 tablespoons unsalted butter, cut into pieces
  • 2 teaspoons fresh lemon juice
  • 1/4 cup chopped flat-leaf parsley

Directions:

Preheat oven to 450ºF with rack in middle.

Toss mushrooms with capers, garlic, oil, and 1/8 tsp each of salt and pepper in a 1 1/2- to 2-qt shallow baking dish. Top with butter and roast, stirring occasionally, until mushrooms are tender and golden, 15 to 20 minutes. Stir in lemon juice and parsley.

Serve with bread.  Or mashed potatoes!


Read more...

So You Wish You Could Dance Sundays

These guys are seriously amazing.  And they look like they are having the best time being amazing.


Read more...

Monday, March 7, 2011

I'm So Flashy: Canon Speedlight 270EX Review

Ever since I got my DSLR, I've been a daytime-only photographer.  When people ask me to take photographs at night, I usually have to say something like, "I'm sorry, but I'm a natural light photographer, and flash violates my artistic sensibilities." If you're laughing, that's okay, because I couldn't say it with a straight face either.

The truth is I'm scared of flash.

Alas, memorable things do happen at night, so I decided that I had to conquer this fear once and for all. So I acquired a cheap and light external flash, the Canon Speedlite 270EX, and am slowly but surely learning to use it. In the interim, I thought I'd document the difference the flash makes . . . in case there are any other new photographers out there who might be interested in getting flashy.


Here is our venerable Chia Obama.  This was shot at around 8 pm, ambient room light only.  (By the way, this and all other photos were shot at ISO 400, f/1.8, using my uber-cheap nifty fifty lens.)  Even shooting on a tripod, the shot is dark and blurry.  It's no way to treat my very handsome President.  


Here he is using the on-camera flash, flash compensation -2.  It's better, but the image looks flat.


Here he is with the Speedlight aimed directly at him.  Oy.  Super flashy flash not flattering for anyone.


But the cool thing about the Speedlight is that you can rotate it up to "bounce" the flash off a surface.  Here is Chia Obama, this time with the Speedlight oriented half-way up (about 40 degrees or so).  I actually think this might be my favorite of the series: the flash is enough to expose the details and depth of the face, but not so overwhelming as to flatten out everything.


And here he is again, this time with the Speedlight aimed straight up at the ceiling.  These last two shots were much better, right?  I mean, a mere mortal might actually look decent under these lighting conditions?


Since mere mortals do need all the help we can get, I invested in a flash diffuser, the Sto-Fen Omni Bounce, which caps right over the Speedlite.  I don't know why a piece of plastic should be $12, but if it can give me a flawless on-camera face, I suppose I shouldn't complain too much.  Anyway, this shot was with the Speedlight and diffuser, flash aimed directly at the object.  Not great, but definitely not as harsh as the version above sans diffuser.


Here is the same shot, but with the diffused Speedlight aimed about 40 degrees up.


And here is the same shot with the diffused Speedlight aimed directly at the ceiling.  There's not a significant difference between the diffused and non-diffused flash when the Speedlight is aimed at an angle or directly at the ceiling, but I think that's just because Chia Obama is made out of a uniformly colored terracotta.  My guess is that the diffuser would make a bigger difference with real people, and would provide a much softer light for faces.

Okay, I'm off to water Chia Obama now.  His "hair" is sprouting only on the back of his head, because I keep forgetting to fill him up with water.  I hope this flash experiment has been useful for some of you.  And for you pros who are masters of light, I'd love to hear your tips!

Read more...
Sunday, March 6, 2011

Diary of a Secret Housewife: Flan Imposible

One of our friends had a tapas party for her birthday this weekend, and I couldn't think of a tapas recipe that would travel well, so I decided to make a flan.


But not just any flan.  (Insert "Mission Impossible" music here.)  Flan Imposible.


Flan Imposible, or Chocoflan, is really two desserts in one: velvety vanilla custard over a layer of gooey chocolate cake.  It gets its name from the magical process by which the custard and cake layers switch positions during baking.  With not too much work, you get two desserts and entertainment!

The recipe I used is Fany Gerson's, reprinted in Saveur, though this is a classic Mexican dessert, so many versions of the recipe abound, including ones that use cake mix (if you want Chocoflan in a hurry).  The centerpiece for this flan is cajeta, which is a goat's milk version of dulce de leche.  Unfortunately, even though we live mere blocks from the so-called Latin Quarter of Boston, I could not find cajeta anywhere.  So I used dulce de leche instead.  Really, though, you could just use a store-bought caramel sauce.  It'll still be good.  In fact, next time I might just make a quick caramel sauce at home; I think a less sweet, more bitter, almost burnt caramel would go really well with the sweetness of the flan and cake.


Preheat the oven to 375°F.  Lightly grease the bottom and sides of an 8-inch cake pan, or you can use a bundt pan, which I think is prettier.

Pour 1/2 to 1 cup of the cajeta (or whatever kind of caramel sauce you're using)  over the bottom and sides of the cake pan using a brush or the back of a spoon (you can heat the sauce very slightly in the microwave so that it is easier to spread).  If you love caramel, you should go all out and use a full cup of it.  But the dessert is plenty sweet already, so I used just enough to coat the pan.


Then make the cake layer.   Combine 3/4 cup sugar, 3/4 cup flour, 1/3 cup unsweetened cocoa powder, 1/2 teaspoon baking soda, 1/4 teaspoon baking powder, and a pinch of salt in a large bowl and whisk until well blended.  In a separate bowl, whisk together 1/2 cup buttermilk, 3 tablespoons vegetable oil, 1 egg (at room temperature), and 1/2 teaspoon vanilla. Add to the flour mixture, whisking until thoroughly combined.  Pour the cake batter into the pan and set aside.


Then make the flan layer.   Combine 12 ounces evaporated milk, 14 ounces condensed milk, 4 eggs, 1/2 teaspoon vanilla, and 1/2 teaspoon salt in a blender and blend until there are no visible lumps. Pour gently over the cake batter.


Cover loosely with foil, place in a large baking dish, and fill the baking dish with hot water so that it comes halfway up the sides.  Bake until a toothpick inserted into the center comes out clean, about 50 minutes.  (I forgot to cover with foil, so there was a thin layer of flan that remained at the top.  Grr.)


Remove the cake pan from the baking dish and allow to cool for at least 4 hours or refrigerate overnight. To unmold, lightly pass a warm knife around the edge, place a plate or dish on top, and carefully but rapidly flip over.  Garnish with toasted nuts or fruit.  Serve cold or at room temperature.


This is a super easy recipe, but trust me, people will be impressed by your flantastic baking skills.  And this dessert not only travels well, but is super tasty the next day.  Be sure to save yourself a slice though; it goes fast, and is very addictive.

Read more...

So You Wish You Could Dance Sundays

The suspension, lines, and athleticism of these dancers is to die for.  Don't miss the second group: they are less flashy but somehow more breathtaking.


Read more...

Tuesday, March 1, 2011

Happy Hump Day

The PS 22 Chorus does three of my favorite Tori songs:


Read more...
Related Posts with Thumbnails

Doubly Happy on Facebook

  © Blogger templates Psi by Ourblogtemplates.com 2008

Back to TOP